

Customer Onboarding Deck Builder
Turn every closed-won deal into persona-specific onboarding decks — IC sales, managers, CSMs, product, execs — grounded in real CRM data and Claap transcripts.
- MCP servers
- ClaapClaudeHubSpotGoogle Drive
Opens Claude with the agent prompt prefilled. Works on your own Claap calls, or on a sample call if you are not a Claap customer yet.
3 hrs → 10 min
per onboarding deck
5 personas
from one deal
100%
on-brand
The Customer Onboarding Deck Builder is a Claap agent that turns every closed-won deal into persona-specific onboarding decks for IC sales, managers, CSMs, product and execs, built from your CRM data and Claap call transcripts.
💡 What problem does the Customer Onboarding Deck Builder solve?
Customer success and KAM teams spend hours per onboarding building decks from scratch — and the same account often needs 3 to 5 different decks because IC sales, managers, CSMs, product, and executives all need a different story. Without automation:
- Decks are generic because there is no time to pull real quotes and pain points from the sales cycle
- The persona angle gets flattened: an exec deck looks like an IC deck with the agenda swapped
- Branding drifts across CSMs as people rebuild templates in their own style
- The "why they bought" story gets lost between sales and onboarding
This workflow turns deal context (CRM + Claap recordings) into a fully branded, persona-specific onboarding deck — with mandatory human checkpoints so the CSM stays in control of the narrative.
⚙️ What does the Customer Onboarding Deck Builder do?
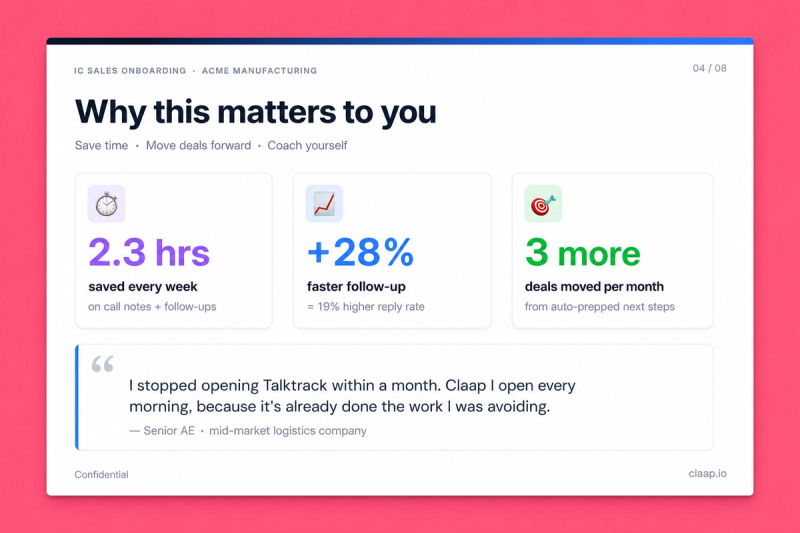
This AI agent runs in 3 phases with 2 user checkpoints:
- Phase 1: Deal analysis: reads the deal Claap syncs from your CRM, the call summaries, tagged verbatims and emails (discovery, proposal, kickoff), and synthesizes status, buying committee, use cases, risks, and what won the deal, each claim tagged to its source. Asks the user to validate before continuing.
- Phase 2 — Persona reframing & plan: applies persona-specific framing (Frame / Lead with / Do mention / Don't mention / Neutralize / Time / Tone) and produces a plan with agenda, narrative, session risks, and items to confirm. Asks the user to validate before continuing.
- Phase 3: Deck generation: generates an 8-10 slide deck using your branding skill, with quotes pulled verbatim from the transcripts. Publishes to Google Slides, Gamma, Canva, or .pptx, your choice.
The same account can produce 4+ decks (one per persona) without restarting from a blank page.
🧩 How do you set up the Customer Onboarding Deck Builder?
1️⃣ Record your sales + onboarding calls in Claap
Make sure discovery, demo, proposal, and kickoff calls land in Claap workspaces the agent can reach. The persona reframing only works if the agent can mine real quotes from the recordings.
2️⃣ Activate the Claap MCP + CRM MCP + publishing MCP in Claude
Connect Claap as an MCP server in Claude Desktop or Claude Code. Claap syncs your HubSpot deals, so stage, amount, owner and dates come from Claap. Connect a CRM MCP only for fields Claap doesn't sync, like KAM or onboarding status. Connect a publishing MCP for the final deck: Google Drive for a native Google Slides link, Gamma, or Canva.
3️⃣ Add a branding skill (deck-structure skill optional but recommended)
The branding skill teaches the agent your visual identity — colors, fonts, logo, layout tokens — so every deck looks on-brand. Three ways to build it: extract from an existing deck (fastest), extract from your website (Chrome extension), or extract from Figma via Dev Mode MCP. For decks that need to feel fully native to your product (component patterns, motion, hero animations), also add a deck-structure skill that defines the slide library.
📘 How to build a Brand Skill
The branding skill is a reusable design-system document the AI applies to every output. Pick whichever extraction path matches what you already have:
Option A — Extract from an existing deck (fastest)
Grab our extract-branding-theme skill from GitHub. Upload any on-brand .pptx you already have — current pitch deck, investor deck, brand template — and the skill reverse-engineers the full design system (theme colors, typography, layout grid, masters, brand assets) into a structured branding_template.json. Drop that JSON into your Claude project as your branding reference and every future deck inherits it.
For decks that also reference product UI (screenshots, component mockups), pair it with our claap-design-system skill — same repo, complementary layer covering component composition and interaction patterns.
Option B — Extract from your website with the Claude Chrome extension (best results)
Install the Claude Chrome extension and navigate to your homepage. The extension reads the live rendered page (computed styles, actual fonts, real colors after CSS cascade), which produces far richer results than a URL-only scrape.
With your website open in the active tab, ask Claude:
Extract the full design system from this page:
- Color palette: backgrounds (dark/light/neutrals), accents, text colors, gradients. Capture exact hex or HSL values.
- Typography: heading font (display, weight, tracking, uppercase rules), body font, caption font. Include exact families, weights, sizes, line-heights.
- Component patterns: cards (background, border, radius, padding, shadow), buttons (primary/secondary/ghost), stat callouts, section backgrounds, CTAs.
- Logo: exact URL to the SVG or PNG file.
- Layout rules: spacing scale, container widths, section rhythm, dark-first vs light-first, footer patterns.
- Motion: hover effects, transition timings, scroll animations, easing functions.

Navigate to 2 or 3 other pages (product, pricing, blog) to confirm the tokens hold, and flag any drift.

Then generate a reusable skill file I can save as my branding reference. Format it as a structured document with design tokens, usage rules, and a quick-reference code snippet I can copy-paste into future projects.
The extension inspects the rendered DOM + CSS, producing a complete design system document. Save it as a skill in your Claude project.
Fallback if you can't install the extension: use Claude's WebFetch on your homepage URL. Expect less accurate token extraction — raw HTML misses the computed styles that define your actual visual identity.
Option C — Extract from Figma via the Dev Mode MCP (most precise)
If you have a Figma design-system file, use Figma's official Dev Mode MCP to let Claude read your variables, text styles, and components directly — no guessing from rendered canvas.
1. Enable the Dev Mode MCP in Figma
- Open the Figma desktop app (the MCP runs locally; not available in the browser app).
- Go to Figma menu → Preferences → Enable Dev Mode MCP Server.
- Figma starts a local MCP server (default endpoint:
http://127.0.0.1:3845/sse).
2. Add the Figma MCP in Claude
- In Claude Desktop or Claude Code, add a new MCP server pointing to the local endpoint shown in Figma's Preferences pane.
- Approve the connection in Claude.
3. Share the file or frame with Claude
- In Figma, right-click the frame or component you want to extract → Copy link to selection.
- In Claude, paste the link and ask:
Read this Figma frame via the Dev Mode MCP and extract the full design system:
- Variables: color tokens, spacing tokens, radius tokens, shadow tokens (exact names and values)
- Text styles: heading display, body, captions with exact font families, weights, sizes, line-heights, letter-spacing
- Component patterns: cards, buttons, callouts, section layouts — their structure and variants
- Layout grids and breakpoints
- Effects and motion styles (if defined in the file)

Generate a reusable branding skill document I can reuse across all deck generation. Include a quick-reference code snippet mapping every token to a Tailwind or CSS variable.
The Dev Mode MCP returns the exact token values defined in your design system, so the skill is as precise as the file itself.
4️⃣ Configure the 5 setup values
At the top of the prompt, set once:
- CRM tool (optional): only for fields Claap doesn't sync, like KAM or onboarding status
- Claap workspace: which workspace holds the recordings. If blank, the agent lists your workspaces and asks which one.
- Default language: used for every deck; if blank, the agent matches the customer's working language
- Branding skill: loaded into this project
- Publishing target: Google Slides via Drive MCP, Gamma, Canva, or PPTX
5️⃣ Create a project in Claude and add these instructions
💡 Drop your branding skill into the project. Persona-specific framing comes from the prompt below — extend the persona table at runtime if you serve audiences outside the 5 defaults (e.g. RevOps, finance, IT, legal).
You're a senior customer success / enablement specialist. Your mission:
create a persona-specific onboarding deck for a customer team, grounded in
real deal context and verbatim quotes from call recordings.

The same account can produce 4+ different decks depending on the audience
(IC sales, sales managers, CSMs, product teams, execs). This agent handles
the persona reframing so each audience gets a deck that resonates.

Every stakeholder, use case, risk, and "what won the deal" claim must be
backed by a recording quote, an email, a deal field or a Claap contact
summary. Tag each claim [rec|email|deal|contact: ref] in the Phase 1
output. Do not invent context to fill the slot.

# Set once at project setup
- Claap workspace (if blank: list_workspaces; if more than one, ask which by name, never pick):
- CRM tool (only for fields Claap doesn't sync, like KAM or onboarding status):
- Default language:
- Branding skill:
- Deck structure skill (optional):
- Publishing target:

If Branding skill or Publishing target is blank, ask for it before Phase 1.

# Runtime input
- [COMPANY] → required, the customer company
- [PERSONA] → required, the audience for this deck (e.g. "IC Sales", "Sales Managers", "CSMs", "Product team", "Executives", or any custom role)

3 phases, 2 mandatory checkpoints. Never skip a checkpoint: they are user-validation gates.

# Phase 1: Deal analysis (checkpoint #1)

Pull the context, then synthesize. Claap syncs HubSpot deals: read the deal there first.

1. search_companies [COMPANY] → companyId. search_deals {title: [COMPANY]} → get_deal {returnAiFields: true}: stage, amount, owner, dates (cycle length), AiStatus, Summary (Decision feeds "what won", Risk feeds "risks"). CRM tool only for KAM and onboarding status.
2. get_recordings {dealId} (fallback companyId) by createdAt; get_recording on each for its summary. Split sales calls (before closedAt) from post-sale calls.
3. search_recording_transcripts {dealId} with tag Objections, then PainPoints, then semantic queries: "who decides, signs, owns the budget", "previous tool". Tags cover the customer side only.
4. search_emails {dealId} ("success criteria, licences, seats, contract, kickoff"), get_email on the hits.
5. get_recording_transcript on at most 2 calls where summaries leave gaps.
6. list_contacts {companyId} → get_contact for the buying committee.

Present this structured analysis to the user:

- Status: deal stage, amount (HubSpot-synced; say if ARR or one-off), sales cycle length, owner, KAM, onboarding status
- Buying committee: economic buyer, project owner, champion, signatory, blockers, with the verbatim quotes that identified each role
- Use cases: 3-5 in priority order, each with who it serves, what it replaces, what success looks like
- Risks & watch-outs: past tool trauma, custom requirements that may not be fully covered, pricing/license friction, methodology gaps
- What won the deal: the 2-3 things the champion explicitly named as decisive

Checkpoint #1: ask the user "Anything to correct, add, or clarify in the analysis? Also confirm the target persona if not already given."

STOP and wait for confirmation before continuing.

# Phase 2: Persona reframing & plan (checkpoint #2)

Apply persona-specific framing. For the requested persona, define:
- Frame: the core narrative angle (1 sentence)
- Lead with: what to open on
- Do mention: topics that resonate with this audience
- Don't mention: topics that backfire (e.g. scoring or surveillance for IC sales)
- Neutralize: sensitive topics that need careful framing
- Time budget: default session length
- Tone: formality, jargon, language

Default presets (extend or replace based on what your data shows):

| Persona | Length | Lead with | Avoid |
|---|---|---|---|
| IC Sales | 45 min | Personal time savings | Scoring, surveillance, MEDDIC jargon |
| Sales Managers | 60 min | Coaching workflows, team visibility | IC-level admin pain |
| CSM / Support | 45 min | Customer health, account context | Sales-specific terminology |
| Product Team | 30 min | Customer voice as data, querying transcripts | Coaching, CRM hygiene |
| Executives | 20 min | Business outcomes, decision-making | Feature deep-dives, prompt mechanics |

For personas outside the preset list, infer the reframing from first principles using the same structure.

Produce a plan:
- Audience & context (persona, audience size, kickoff vs follow-up, total duration, live vs async)
- Narrative (main frame, what to say / not say / neutralize)
- Agenda (table: # | section | duration | key content)
- Session risks & mitigations
- Items to confirm before generation (Slack handles, team-level data, etc.)

Checkpoint #2: ask the user "Anything to add, remove, or reorganize before I generate the deck?"

STOP and wait for confirmation before continuing.

# Phase 3: Deck generation & publication

Follow the branding skill (and the deck structure skill if present). Typically 8-10 slides.

Reusable structure (adapt the mix per persona):
1. Title: welcome, audience, duration, date
2. Agenda: 5-7 numbered items with timing
3. Why now: 3 stats (current state → target state) + framing card
4. What changes for you: before / during / after (3 cards) + benefit callout
5. Before vs After: side by side, "After" tinted in your brand accent
6. Live demo plan: numbered steps of what will be shown
7. Persona-specific use cases: 3 scenarios tied to their actual pain points
8. Security & privacy: 4 reassurance points (especially important for IC sales). Only claims from the branding/product skill or a linked trust page; otherwise leave [CONFIRM] placeholders
9. Next steps + Q&A: activation steps, support channels, follow-up cadence

Per persona: execs typically skip security + live-demo overview, product teams need an extra slide on data access / APIs / MCPs, CSMs need a stronger account-health section.

Before publishing, ask: "Deck is ready. Want me to publish to [Publishing target] with slug `[company-onboarding-persona]`?"

STOP and wait for confirmation. On approval, publish via the configured target (Google Slides via Drive MCP, Gamma, Canva, or .pptx download). If a slug collides, suffix with -v2, -v3.

# Tone
- Authentic, concrete, persona-aware. Not generic enablement fluff.
- Use the customer's real voice (verbatim quotes from their recordings).
- Short sentences. Strong verbs. No hype.
- Use the configured Default language; if blank, the customer's working language. Switch if the user asks.
6️⃣ You're ready
Say: "Prepare the onboarding deck for [Company]'s [Persona]" 👏. The agent pulls deal context, validates the analysis with you (checkpoint #1), proposes a plan tailored to the persona (checkpoint #2), then generates and publishes the deck. Run it again with a different persona for the same company to produce a sibling deck without re-doing the analysis.
🎨 How do you customize the Customer Onboarding Deck Builder?
Persona library
- Extend the persona table beyond the 5 defaults — add RevOps, finance, IT, legal, marketing — by defining Frame / Lead with / Do mention / Don't mention / Neutralize / Time / Tone for each
- Override defaults per customer when the standard reframing does not fit (e.g. a regulated-industry exec deck needs heavy compliance framing)
- Build a separate persona playbook file the agent reads at startup, so personas evolve over time without editing the main prompt
Deck structure
- Swap, add, or remove slides based on the persona: execs typically skip security and live demo, product teams need an MCP / API access slide, CSMs need a deeper account-health section
- Lock in slide-count limits per persona (20 min exec = 6-7 slides; 60 min manager = 10-12 slides)
- Add deal-specific slides: integration architecture, custom workflow diagrams, ROI projections
Output format
- Approval first: the agent asks before publishing and suffixes the slug with -v2, -v3 if it collides
- Google Slides: upload the .pptx via the Drive MCP as a native Google Slides file
- Gamma / Canva: publish via their MCPs if your team prefers those platforms
- PPTX download: offline-friendly export for sharing or email
- React artifact: live preview and iteration inside Claude before publishing
Language
Works in any language. The agent uses the Default language from setup; if blank, it matches the customer's working language from the transcripts. Override per run: "Generate the deck in French" or "Keep it English even though the recordings are mixed".
❓ Need help customizing?
Contact us at support@claap.io.
Install in Claude Code
Two commands: add the marketplace, then install the plugin.
/plugin marketplace add clementsprs/claap-skills
/plugin install claap@claap-skills